Immersive Video Wall
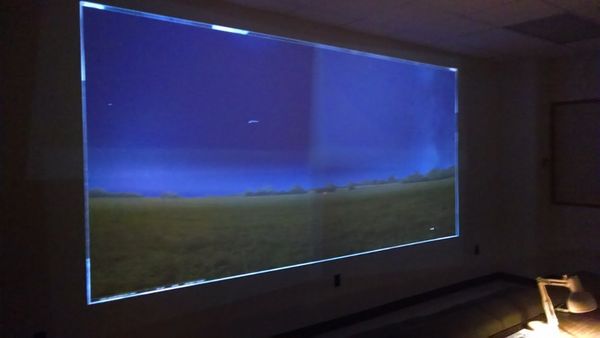
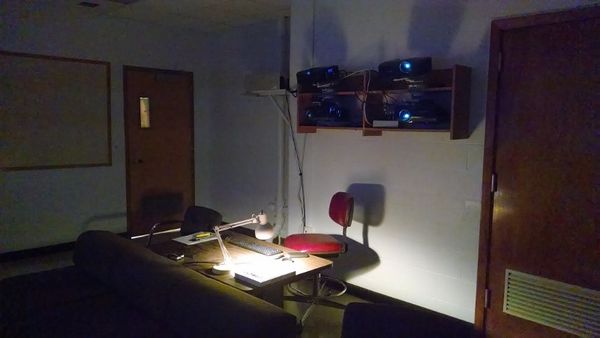
The teaching astronomy lab on the University of Louisville's Belknap campus has a room dedicated to immersive video. It features 4 theater quality projectors creating a blended high definition (HD) quality screen that students can view interactively. The projectors are driven by a state-of-the-art graphical display computer system running Vioso Anyblend edge blending software on a Windows operating system.
This page is for the use of teaching assistants in the lab, and for students and others who may be interested in the technology.
How to use the room
For students this room is very easy to use. The instructor and teaching assistants will have it ready for you, and the application you will use for your work in that lab will be running. However, here are some suggestions, and a few requests. First, the requests:
- Use only the application which is needed for this lab. It will be "full screen". (If not, ask for help.)
- Do not make any adjustments or changes to the projectors, or to run any other windows application on the system. We have it optimized for this one task, and the next group will need this application running.
- Do not turn off the projectors. It takes a while for them to cool down to allow turning them back on. The assistants will do this when it is appropriate.
And then the suggestions:
- If the screen is dark, try moving the mouse. It may have timed out. Or, if the projectors are not running ask the assistant for help. Please do not try to start them yourself.
- There is no monitor! The wall is the screen. Interact with the display using the mouse and keyboard.
- Have one of the group "drive" seated at the desk and the others interact with the driver from better seats. You can change roles, of course.
- The best view is from the front seats, close to the screen. With Stellarium displaying the horizon across the wall, the sky will be scaled almost as you would see it outside.
- It helps to keep a low level light on. This reduces the appearance of a blending artifact in the black background. (We are working to remove it.)
- When you are finished, please reset Stellarium to Louisville at the current time.
Running Stellarium
The room is used to run a day/night sky simulation using Stellarium. This software is also on the other computers in the lab, but here it is more immersive, and creates an experience closer to what you would see in the real sky. We have Stellarium set up to be located in Louisville, Kentucky. If you change the location, before you leave please reset it to Louisville and the current date and time.
Stellarium should run covering the entire screen. However, in order to have it work with this hardware, we have to "stretch" the window to cover the screen. The instructor and assistants should have this already set this way. Do not use it with the small window because that defeats the purpose of the immersive wall. However, if Stellarium is not running it is easy to get it going:
- Double click on the Stellarium icon on the upper right of the Windows desktop.
- Click on the lower right corner and drag it to cover the desktop.
- Recenter and drag as needed. You should only see Stellarium when it is set correctly, as in the picture at the top of this page.
Stellarium has two menus that are hidden on the lower left bottom and lower left edge of the window. Slowly slide the mouse down at the left side and the lower menu will pop up. You can experiment with the various buttons. The critical ones are those on the right that control time and the rate that time goes by. One of them will reset to the current time, and the others will go forward, backward, or change how fast time goes by. When you are finished, please leave the softare running in "real time", located in Louisville.
You interact with the display by moving the mouse around. You can identify objects, look in different directions, and zoom in and out with the mouse. Just try the buttons and you'll learn quickly how to control what you see.
Instructions for the teaching assistants
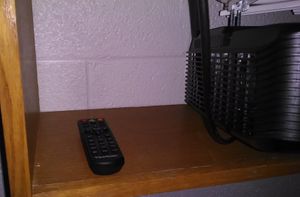
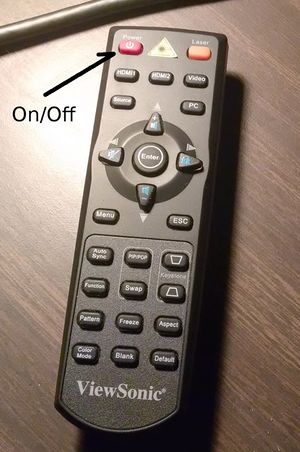
To turn the projectors on or off use only the remote control. It should be kept on the lower left shelf so that it is not out for students to inadvertently use. Remember that once the projectors are powered down, there is about a 15 minute delay before you can power them up again.


