Separate programs are used to control the spectrograph and the camera. To make the operation easier for you, we have these set to run from icons on the astrolab user screen of the Linux computer system zeno. This computer is connected to the CCD camera and spectrograph in the laboratory through its parallel and serial ports, and our software communicates with these instruments. The computer system will be up and running already (these computers stay on 24 hours a day), and the lab assistant will have given you access as User: astrolab. If you see a Login prompt, then ask the assistant or Prof. Kielkopf for help.
First of all, Turn on the powerstrip into which the spectrograph and CCD camera are
plugged. Please turn it off again when you are finished.
If there are any other programs or terminal emulating console screens running,
turn them off by clicking on the ![]() in the upper right corner of the
frame for that program.before you begin this experiment.
in the upper right corner of the
frame for that program.before you begin this experiment.
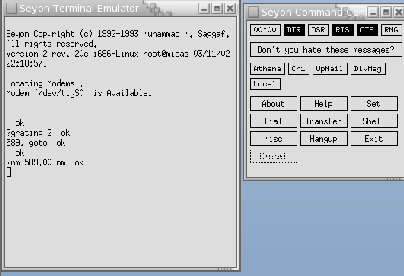
Double click with the left mouse button on the ``Camera'' icon to start the CCD camera control program. Notice that at the lower right corner of the computer screen there is a small map with four squares. Each one of these is a miniature screen, and you can switch to another one by simply left clicking on the square. The CCD camera software will have created two windows for you, one that has the camera information, and the other that displays the images. There is little space left for another window, so before starting the spectrograph program click on the second screen box at the lower right. This will show you a mostly empty screen, although your CCD program is still running out of sight on the first screen. Now double click on the Spectrograph icon and after a few seconds you will see a couple of new windows from ``Seyon'', a program that is communicating with the spectrograph.
You will not need to issue many commands to the spectrograph, but a list of those that are useful is in the table below. You may need to left click on the frame of the Seyon Terminal Emulator to make it active. Once it is highlighted, simple press the Enter key. The spectrograph should respond ``ok''. Try the command ``?nm'' to ask what wavelength in nanometers is currently at the center of the CCD. It should respond ``0.'' because it was just turned on and that's where it starts from. The grating and the mirror setting that you will need for this experiment are already selected by default. Send the spectrograph to look at the yellow sodium D-lines with the command ``589. goto''. Notice that you must type in the wavelength in nm first, then the goto, and then press enter. After a brief pause the spectrograph will say ``ok'' and you are ready to take exposures with the camera. You can check the wavelength with the inquiry ``?nm'' of course.
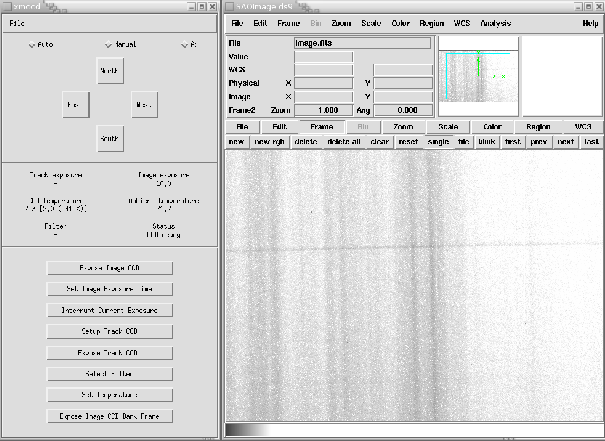
Return to the first screen (click on the leftmost of the screen boxes at the lower right) and look for ``CCD Ready'' on the xmccd status display. If you do not see this, then something is not right, so you may need to ask for help. The image below will show you what this should look like, although the images and the CCD status indicators will be different in your case.
Now you should turn on the CCD cooling.
Click on the xmccd window, select ``Set Temperature'', enter ``2'', and click ``On'' to set the temperature at 2 degrees Celsius. You should see the temperature of the CCD begin to drop as the controller tries to cool it. After a few minutes the temperature should stabilize at the selected value. When you are finished you should again ``Set Temperature'' and select ``Off'' to turn off the cooling and allow the device to return slowly to room temperature. Here ``2 C'' is cool enough to reduce dark current to an acceptable level for the short exposures you will need in the laboratory, and warm enough that it is unlikely frost will form inside the detector head.
Select ``Set Image Exposure'' and enter ``100'' seconds. The CCD is now ready to use to take exposures of 100 seconds.
| Spectrometer Commands | |||
| Command | Action | Example | Response |
| ?nm | What is the wavelength? | ?nm | 546.1 nm ok |
| goto | Go to new wavelength | 546.1 goto | ok |
| ?gratings | What gratings available? | ?gratings | list of gratings |
| ?grating | Which grating is in use? | ?grating | 2 ok |
| grating | Select a grating | 3 grating | ok |
| exit-mirror | Select the exit port mirror | exit-mirror | ok |
| ?mirror | How is the mirror set? | ?mirror | front ok |
| side | Set mirror for exit slit | side | ok |
| front | Set mirror for ccd camera | front | ok |